
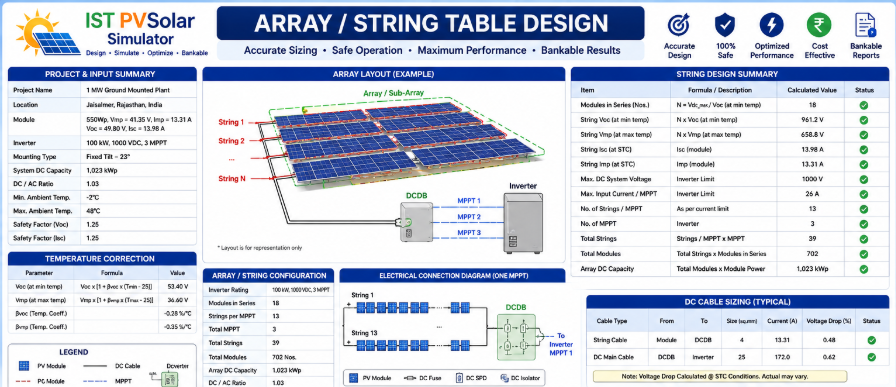
Module Table Design: The Small Drawing That Saves Big Mistakes on Site
Ask any solar installer about their worst on-site surprise, and a common one comes up again and again: the racking arrives, the modules arrive, and somehow the string count doesn't divide cleanly across the table. Now someone's cutting a rail, re-routing wiring, or worse — ordering extra structure on a deadline. It's a small design oversight that turns into a real cost and delay.
Let me pull more detail from the IST PVSolar Simulator on this specific feature before writing, so the post is accurate rather than generic.
What It Actually Draws
The tool renders a to-scale, top-down view of a single mounting table: the physical grid of modules that sits on one structure. It's not a generic placeholder diagram — every dimension on it is computed from your real project inputs:
- R — how many modules are stacked vertically on the table (pulled from your 3D Shading Model / Module Geometry setup)
- C — how many modules run across horizontally, calculated as Modules per String ÷ R
- l × w — the actual module length and width for your selected panel
- gap — the spacing you've set between adjacent modules
From those, it computes the two numbers that actually matter for procurement and site layout:
Table Length = C·l + (C−1)·gap Table Height = R·w + (R−1)·gap
Both numbers are drawn directly on the diagram with dimension lines, the same way a structural drawing would present them — not buried in a table of values you have to interpret yourself.
The Detail That Actually Prevents Mistakes
Here's the part that matters most: the tool checks whether C comes out to a whole number. If your string length doesn't divide evenly by the number of rows you've configured — say, an 11-module string split across 3 rows — the drawing doesn't just quietly round the number. It renders the shortfall as a dashed, differently-colored partial module in the last column, with an explicit warning that your Modules-per-String count isn't evenly divisible by the row count.
That's the moment a design mistake becomes visible on screen instead of on a delivery truck. Instead of discovering during procurement that your table doesn't cleanly fit your electrical string configuration, you see it the moment you set your row count — while it still costs nothing to fix.
It's Connected, Not Standalone
This is the detail that separates a genuinely useful design tool from a diagram generator: the module table isn't something you configure in isolation. Its inputs come straight from decisions you've already made elsewhere in the project —
- Row count and module geometry from your 3D Shading Model
- Module dimensions and inter-module gap from your selected panel and mounting settings
- Modules-per-string from your electrical string design (Sub-array configuration)
— which means the table layout you see is always consistent with the rest of your design. There's no separate "structure design" step where you re-enter numbers and risk them drifting out of sync with your actual electrical configuration.
And the relationship runs forward too: your table's Length and Height feed directly into the Row Spacing Calculator, which determines inter-row distances and self-shading — meaning your physical table dimensions and your shading/generation estimate are describing the same real structure, not two loosely related assumptions.
Why This Matters Most for Newer Developers
If you've got a structural engineering team, table design mistakes get caught in review. If you're a newer solar business running lean, you may not have that safety net — which is exactly when a small, silent mismatch between your electrical design and your physical layout is most likely to slip through to procurement or installation.
Having the table dimensioned, validated, and drawn to scale automatically — with mismatches flagged visually rather than left for someone to notice later — means a one-person or small-team operation gets the same layout discipline a larger EPC would apply manually. It's a small feature, but it's exactly the kind of small feature that keeps a first or second project from turning into an expensive lesson.
The module table drawing updates live from your existing project inputs — row count, module geometry, and string configuration — so there's nothing extra to configure, and nothing that can quietly fall out of sync with the rest of your design.